
How to grant a badge with an automation
An automation connects a platform event to an action. It can grant a badge without an administrator opening each user record.
For example, completing a course can grant the badge that unlocks the next stage. You choose the source course and destination badge.
Click your profile picture in the top-right corner and open Admin panel. Use Search... in the sidebar to find the last item in this path: Integrations › Automations.
1Create the rule and choose the event
Click New Automation and give it a descriptive name. The editor creates an INACTIVE draft and saves changes automatically. Under Event, choose Course completed and select the course. Use CONDITIONS if you need further audience restrictions.
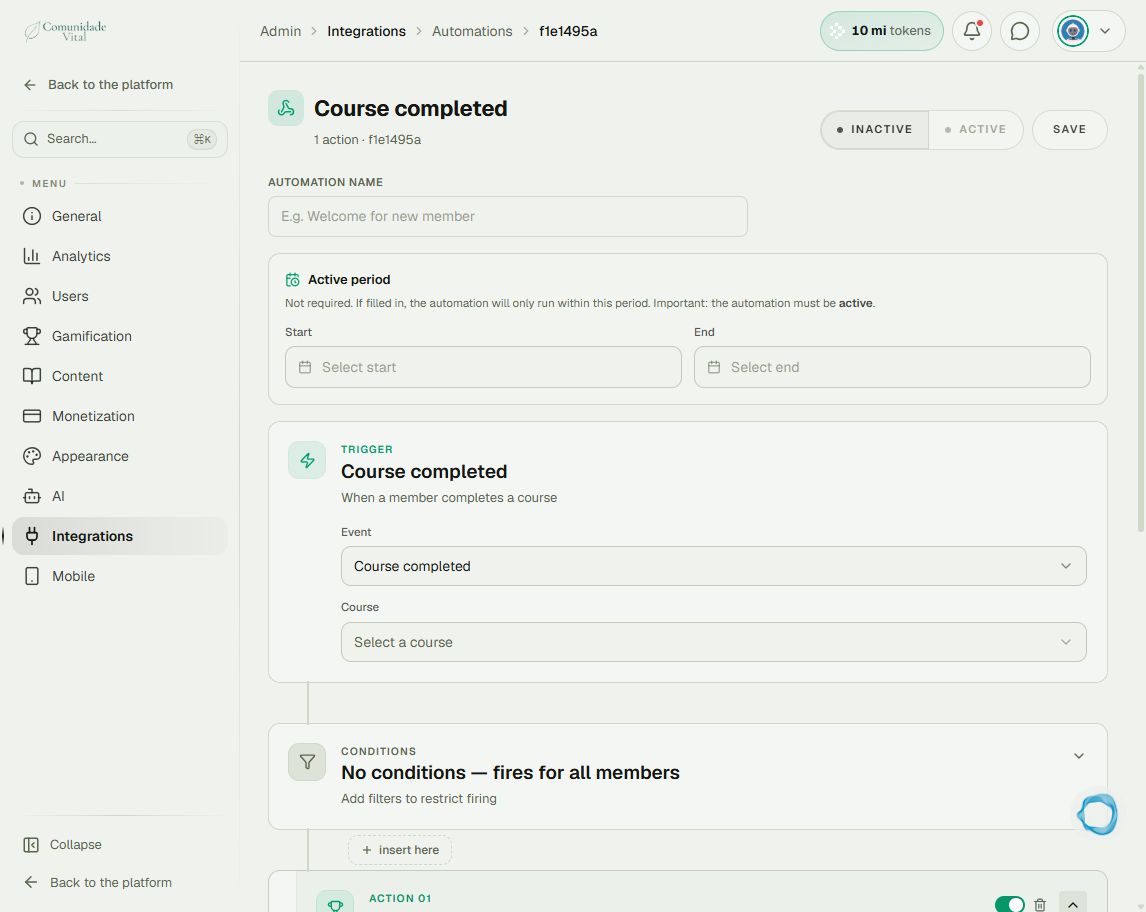
2Configure the badge and expiration
Click Add first action and choose Grant badge. Select the badge. Under Expiration, In days (relative) counts from the event; an empty value means no expiration. For a shared expiration date, choose Fixed date (absolute) and enter the date. Check the action’s save indicator.
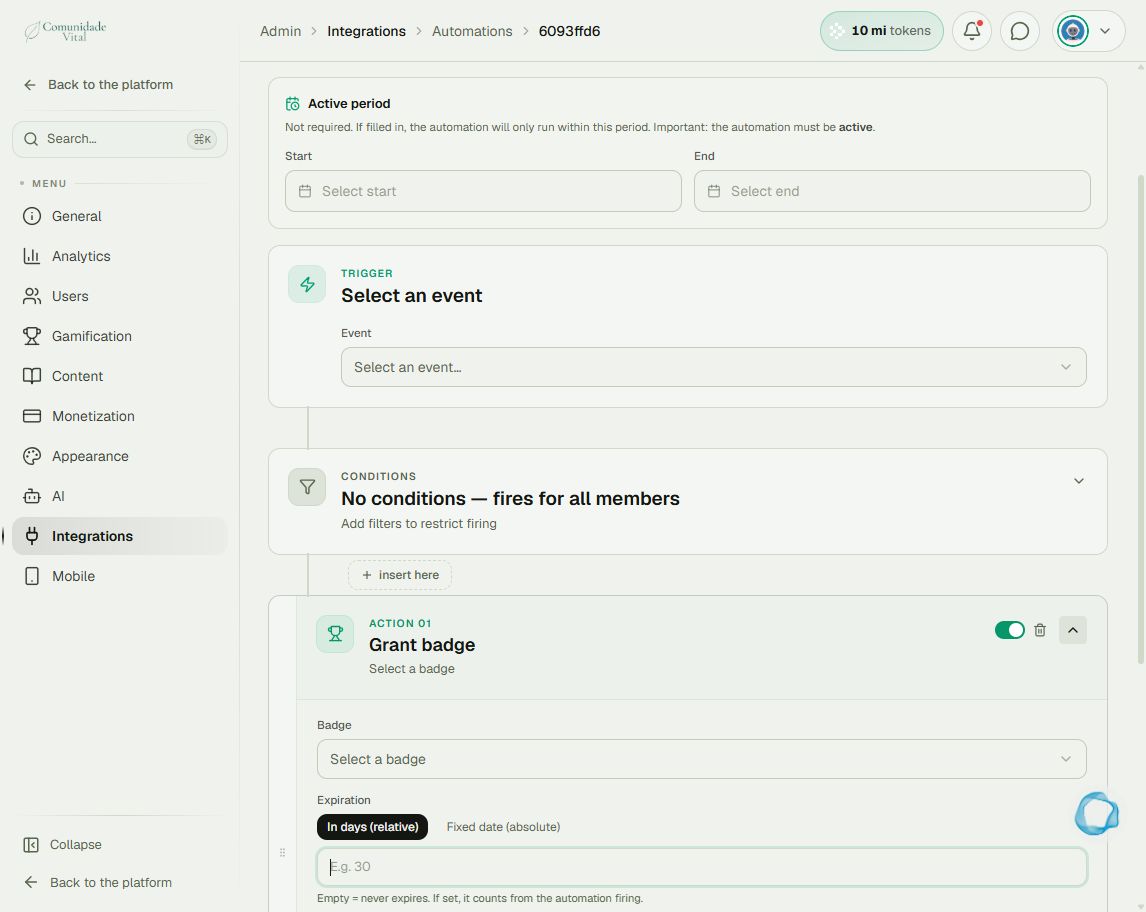
3Review before activating
Review the course, conditions, badge, and duration. Use SAVE for any settings still requiring a save, then switch the status to ACTIVE. Saving is not activation. After a new eligible event, check the participant’s record for the badge.
Tip
A native purchase can grant the badge directly through its payment link. External sales use received webhooks or an integration/API. Read those articles before creating rules that deliver the same access twice.
Frequently asked questions
Do previous graduates receive it automatically?
No. Event-based rules react to new events. For earlier participants, read the bulk-assignment article.
Can I use a schedule?
Yes, but a recurring trigger runs again at each scheduled time. Add conditions to prevent unwanted repetition, especially when combining coins or messages.