
How to assign badges in bulk
A bulk action assigns the same badge to an identified audience without searching for each person separately.
For example, people who hold a class badge can receive another badge for a new stage. The badge you open defines the source audience; the badge chosen in the action is the destination.
Click your profile picture in the top-right corner and open Admin panel. Use Search... in the sidebar to find the last item in this path: Users › Access badges.
1Open the source audience’s badge
Click the name of the badge held by the people who should receive the action. Check its holders first. A badge-based action targets holders with Active status; people with incomplete registration may appear in the list but remain outside the operation.
2Choose the destination badge
Click Bulk actions. Under Action, choose Add badge and select the badge to grant. Check the source audience named at the top of the form.
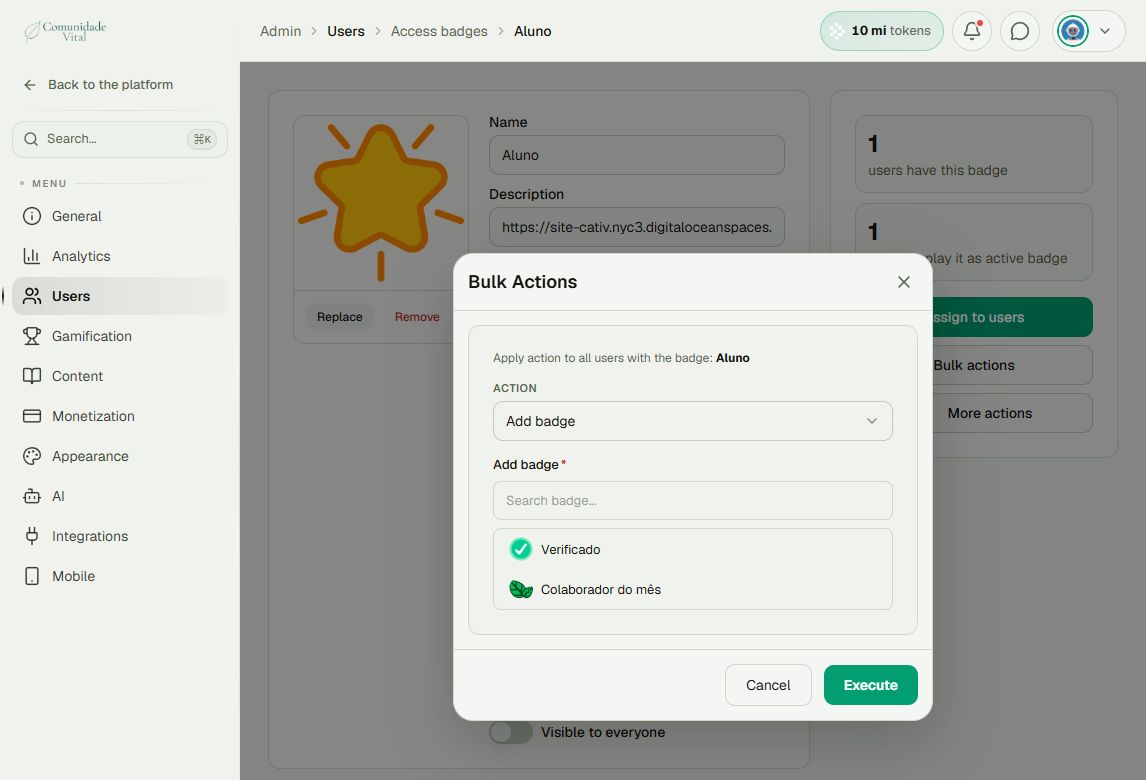
3Execute and monitor
After reviewing source and destination, click Execute. Follow progress at the top of the panel and check the final report. Inspect a few user records to confirm assignment. Wait for completion before starting another bulk operation.
Tip
This Add badge workflow does not configure expiration. For time-limited access, read the individual-assignment, automation, or badge-import articles and check each operation’s specific rules.
Frequently asked questions
Is the audience the whole platform?
No. In this procedure, the audience comes from the source badge and the operation’s conditions.
Can I make it recurring?
Yes, through an automation with an appropriate trigger. Running a bulk action does not create an automation.