
How to set up a rewards store
A rewards store lets people exchange wallet coins for items. It gives participation in your program a concrete benefit.
For example, a student can redeem an e-book or a place in a course. The store uses points/coins; cash sales use payment links.
Click your profile picture in the top-right corner and open Admin panel. Use Search... in the sidebar to find the last item in this path: Gamification › Stores.
1Create the identity and access rules
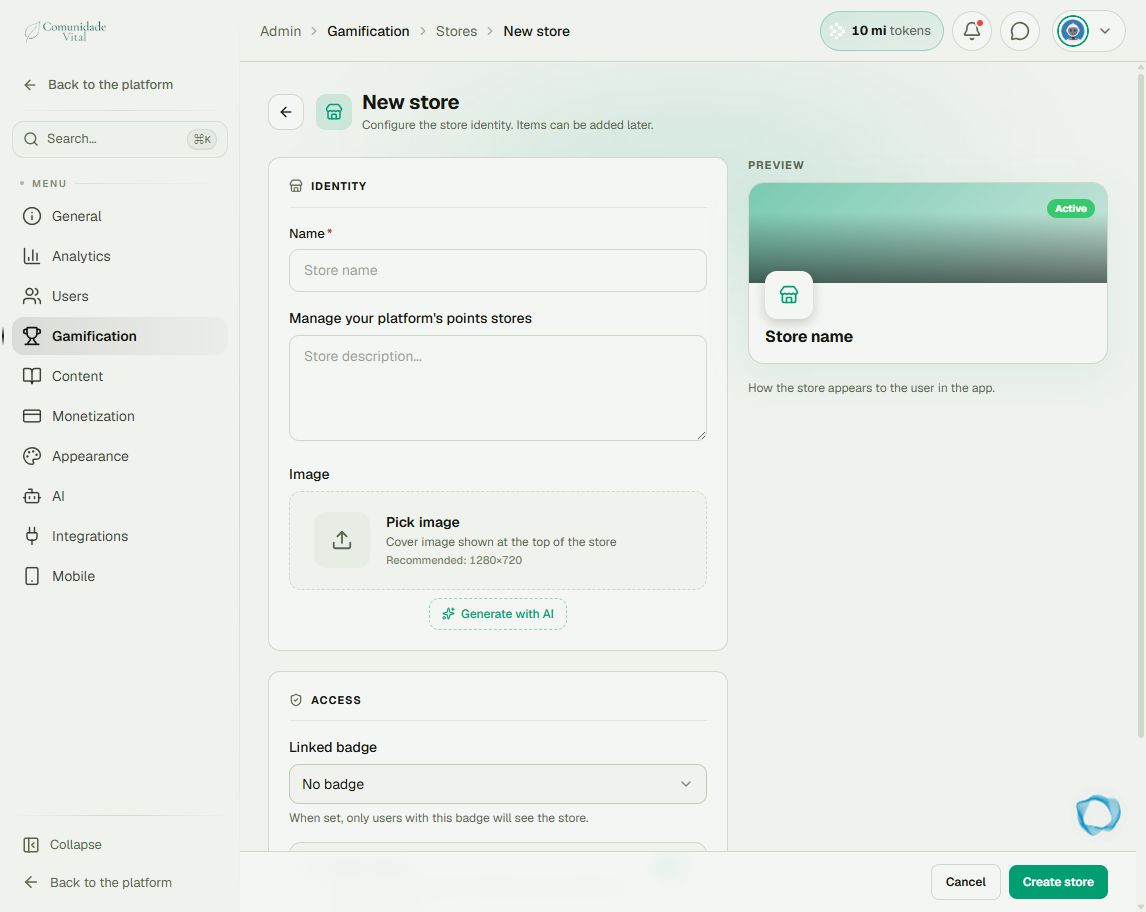
Click New store. Enter name, description, and image. Under Access, review Linked badge, Public store, and Store active. A public store ignores badge restrictions; if you turn public access off, select the badge that permits entry. Click Create store.
2Add items
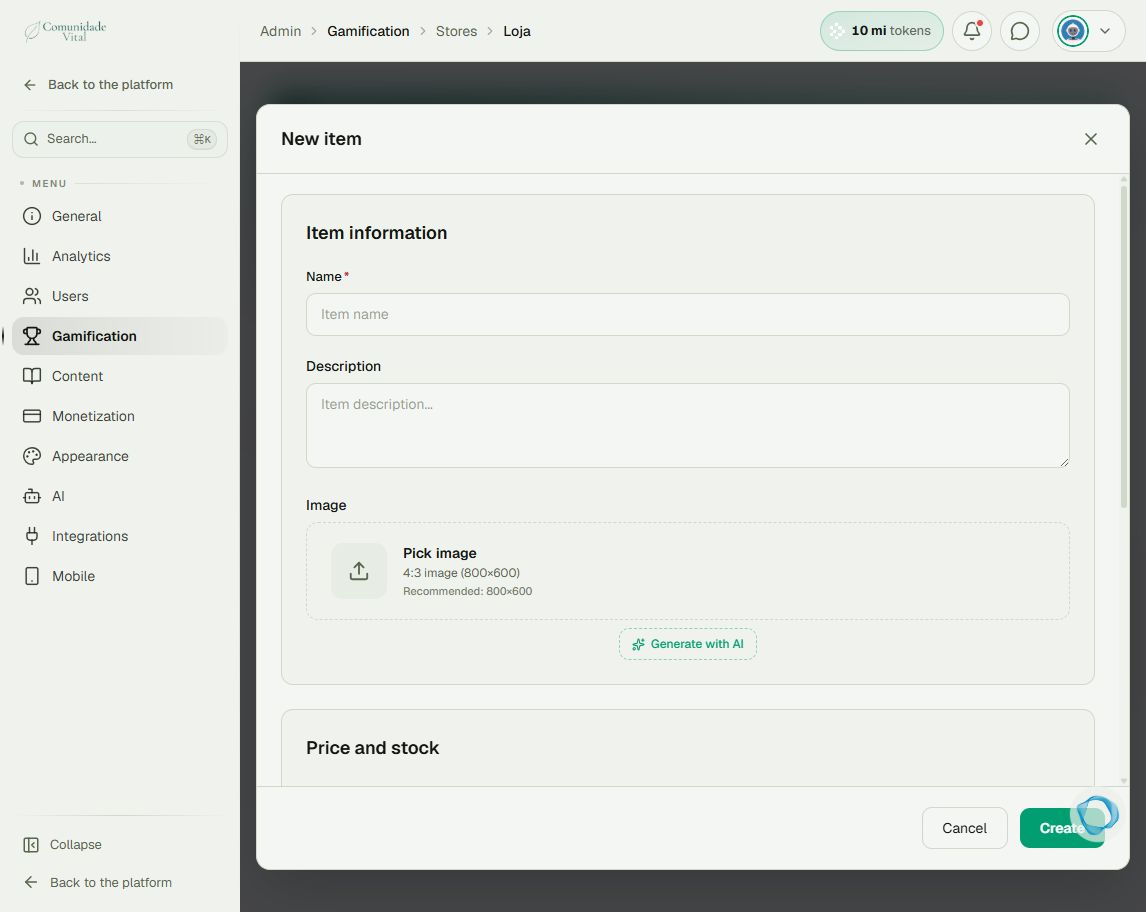
Open the store and go to Items › New item. Enter name, description, image, and Price in points. Configure Item active and, for stock control, Limited quantity and available quantity. Under Automatic release, decide whether delivery grants a badge, course, or group access. For a physical gift, leave automatic delivery off and arrange manual fulfillment. Click Create.
3Check as a member and follow orders
Check the store with a profile from the intended audience: administrator visibility does not prove member restrictions. Follow redemptions under Orders. For manual items, arrange delivery and update the order when fulfilled. The store does not calculate shipping or collect delivery addresses.
Tip
Plan delivery communication: an order’s status does not replace a message to the student. For recurring access rules, read about automations and badges.
Frequently asked questions
Can the store accept cards or cash payments?
No. This is a coin-based rewards store. Use payment links for cash sales.
The student cannot see the store. What should I check?
Check that it is active and either public or linked to a valid badge held by the student, and that items are active. For the shortcut, also check the Store feature.