
How to invite people to the platform
An invitation authorizes a person to register on your platform. It is useful when welcoming the participants of a new class, for example.
An invitation does not create an account immediately: the person still needs to complete registration. It also does not replace the badges required by restricted content.
1Open the invite list
Click your profile picture in the top-right corner and open Admin panel. Click Search... in the sidebar, search for Invites, and open the result under Users. Keep the By Email tab selected.
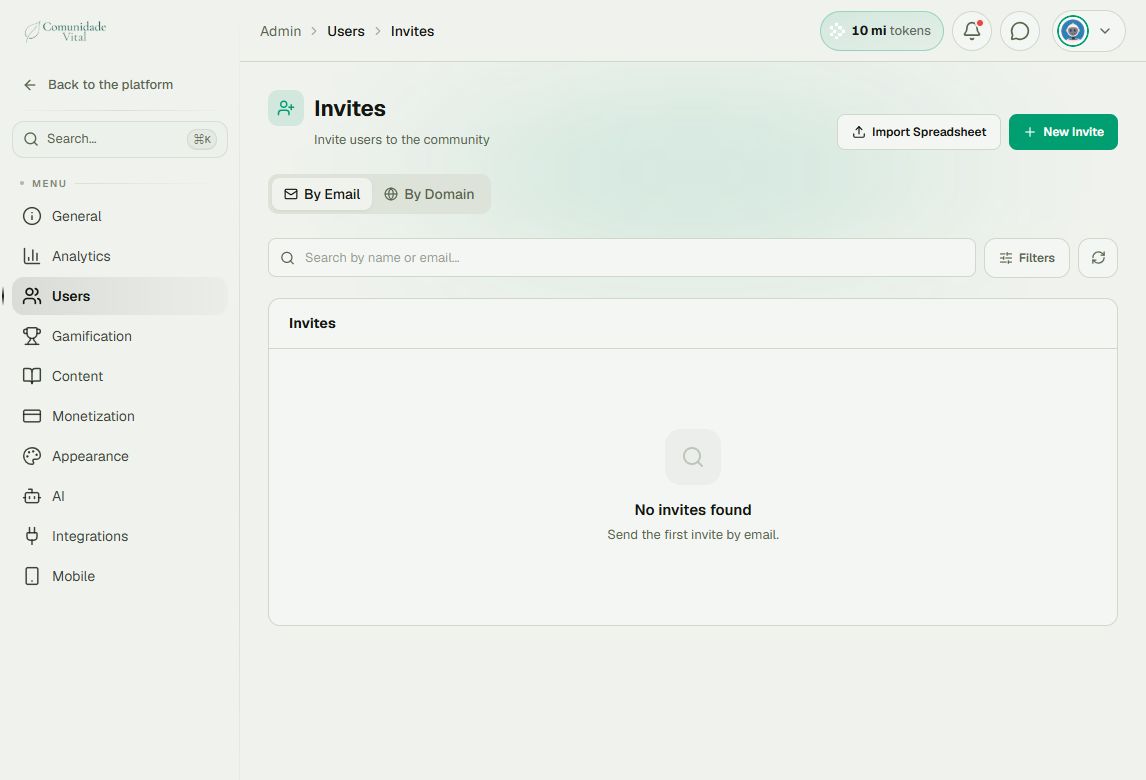
2Complete the invitation
Click New Invite. Enter Name and Email. Review the address before clicking Invite: it must match the address the person will use to register.
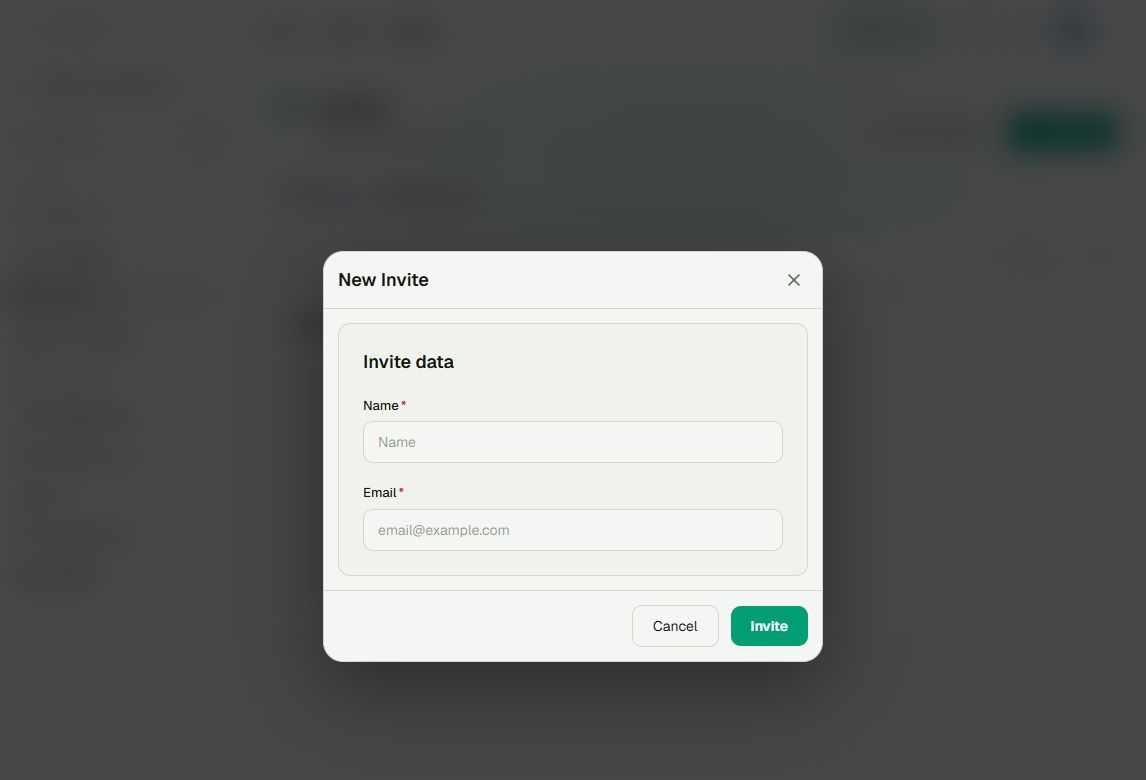
3Check registration
Search the invite list by name or email and check its status. A pending invitation has not yet been accepted; an accepted invitation means the person completed that step. After registration, look for the person in the Users list.
Tip: inviting an entire class?
Use Import Spreadsheet on the Invites page and consult the template provided in that form. Importing invites and importing users are different operations: an invitation still requires the person to register.
To create accounts from a data file, read the user-import article.
Frequently asked questions
Can the person register without receiving the email?
For an individual invitation created through this form, the person can open the platform address and register with the invited email address. Check the spelling and spam folders. Invitations created through other workflows may have different requirements.
Does an invitation automatically unlock a course?
Do not treat an invitation as a content-access grant. After registration, check the badges required by the course and assign them according to your program's rules.
What happens if the person already has an account?
The invitation does not change an existing account. If the person forgot their password, guide them through account recovery.