
How to configure menus and who can see them
Menus are shortcuts to platform areas. Shortcut visibility and permission to open its destination are separate settings.
For example, an item can lead to a class showcase and appear only to badge holders. The destination content also needs the appropriate access rule.
Click your profile picture in the top-right corner and open Admin panel. Use Search... in the sidebar to find the last item in this path: Appearance › Menus.
1Choose the position
Use Desktop or Mobile and click the preview position. Labels remain in Portuguese: Menu lateral (sidebar), Menu superior (top menu), Tabs inferior (bottom tabs), and Destaques mobile (mobile highlights). The adjacent list matches your selection.
2Set the label and destination
Click Adicionar item (add item), enter Rótulo (label), and choose an internal destination or external URL. For internal destinations, select the type and specific resource when requested. Choose a recognizable icon.
3Configure who can see it
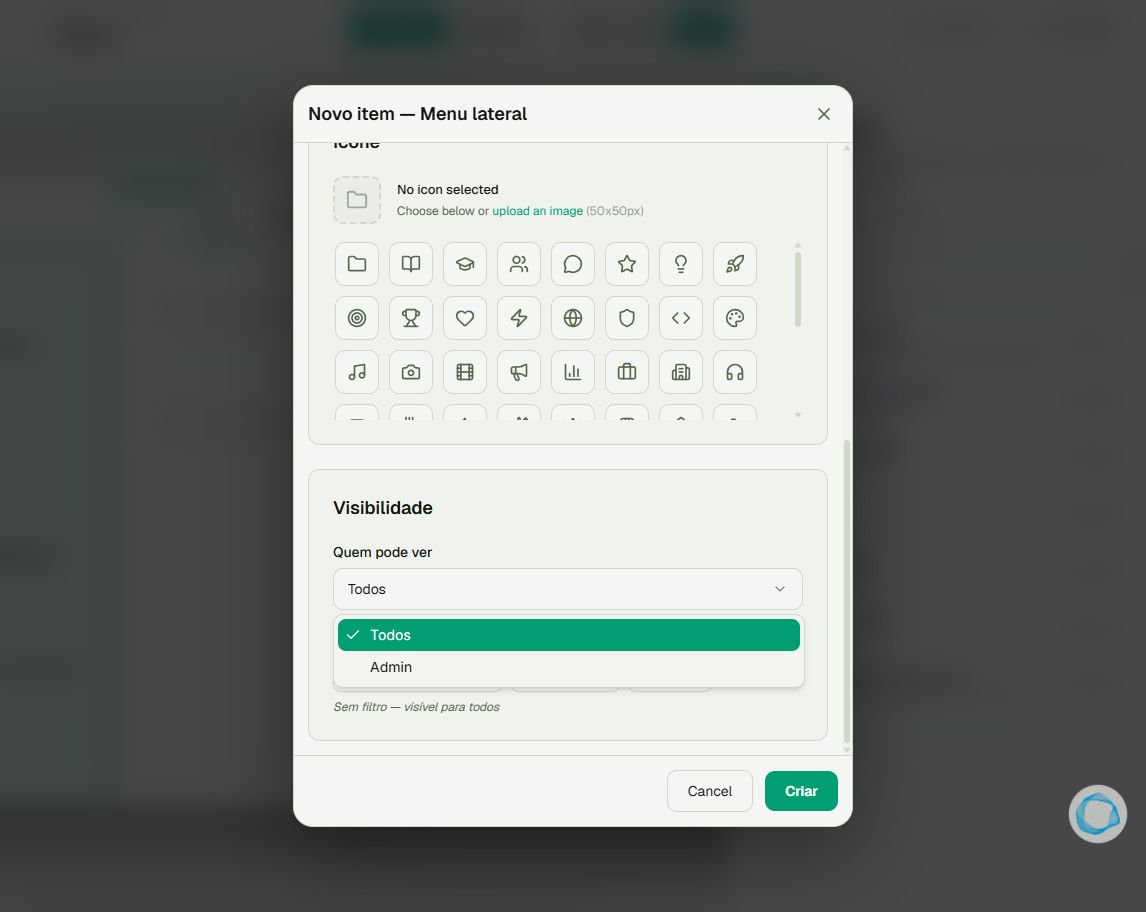
Under Quem pode ver (who can see), choose Todos (everyone) or Admin. With Todos, use Badges permitidas (allowed badges) to limit the item to holders of selected badges. No selected badges means no badge filter. Choosing Admin clears and hides badge selection.
4Save and check navigation
Click Criar (create) for a new item. To edit an existing one, open it from the list and save. Check placement and destination on desktop and mobile with an account in the intended audience. Dragging items to reorder saves the new order.
Tip
Use showcases to present several pieces of content on a page and menus to reach that page. Read the showcase and badge articles.
Frequently asked questions
Does hiding the menu protect the content?
It does not replace destination permissions. Check the course, group, or resource’s access.
Is an admin account suitable for checking restrictions?
Use a member account in the intended audience; administrators may have broader access.