
How to configure profile fields
Profile fields store additional information about each person, such as company, professional area, or student number.
For example, a Company field identifies each participant’s organization. Decide beforehand who should see and edit that information.
Click your profile picture in the top-right corner and open Admin panel. Use Search... in the sidebar to find the last item in this path: Users › Profile Fields.
1Create the field
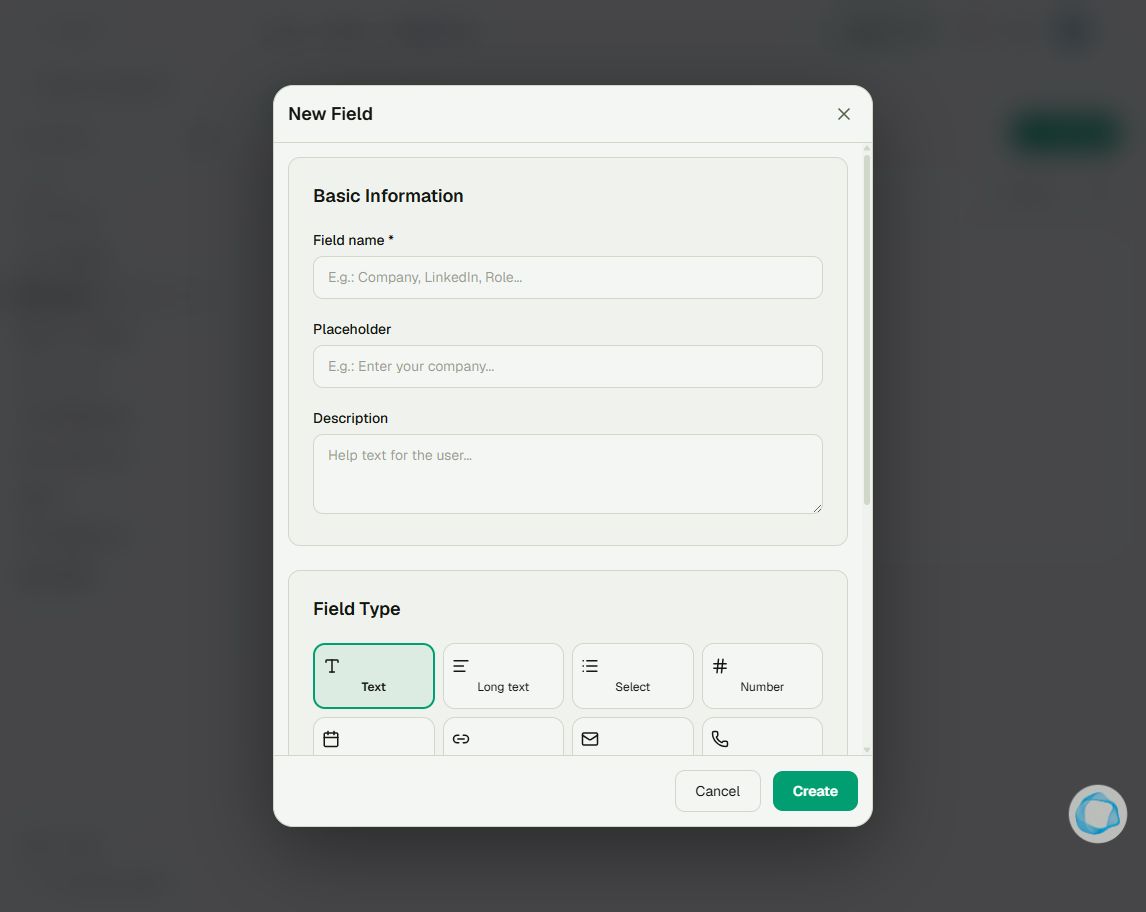
Click New Field. Enter the Field name, a hint in Placeholder, and a description if needed. Choose a recognizable name, such as Company.
2Choose the type and visibility
Choose the appropriate type: text, long text, select, number, date, URL, email, phone, or Yes/No. Select fields need at least two options. Visible on profile displays the value publicly on the profile; Editable by user lets the person change it.
3Save and check the result
Click Create. Check that the field appears in the list, then open a user record to check its availability. On the member profile, verify that visibility and editing match your choices.
Tip
Need to require an answer? Use a form with a required question. Profile fields do not automatically add required questions to registration. Read the forms article.
Frequently asked questions
Is the field filled automatically?
No. Creating the field definition does not populate people’s values.
Can I use a list of options?
Yes. Choose Select and add the options users can choose from.