
How to upload a video to a lesson
Native upload sends your file to the platform and prepares it for streaming. Uploading and processing are separate stages.
For example, you can turn a recorded presentation into a lesson. Have the MP4 file ready and allow time to check playback before releasing it.
Start on the platform, outside the admin panel. If you are in the panel, click Back to the platform. Follow this path: Cursos (courses) › your course › Manage › Módulos (modules).
1Choose video and native upload
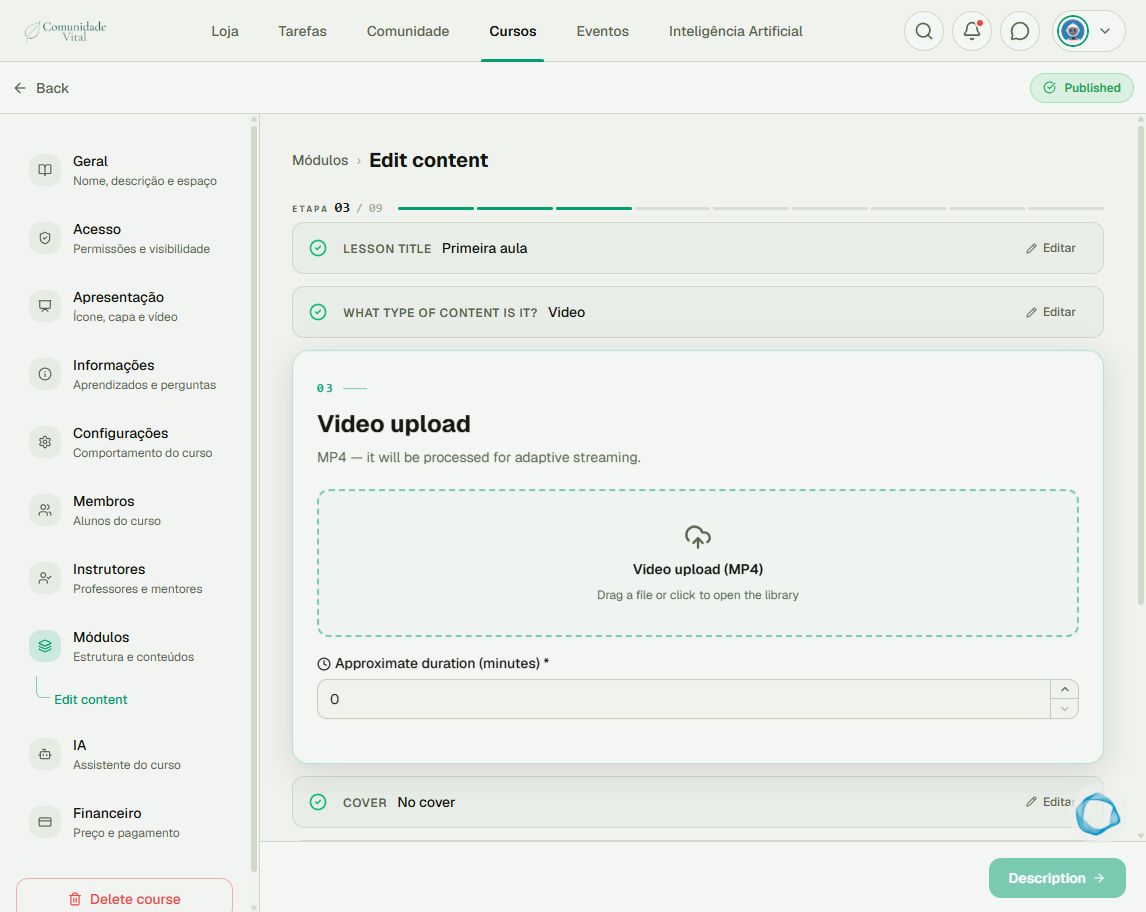
In the module, click Create lesson or edit an existing lesson. Enter the title. For content type, choose Video, then New video. The Upload video step shows the MP4 upload area.
2Upload and wait for processing
Drag the MP4 into the indicated area, or click it to open the library and select/upload the file. Keep the page open during upload. Wait for processing: the end of the transfer does not mean the video is ready to watch.
3Complete the lesson and check playback
Check Approximate duration (minutes); use the automatic value when available or enter the correct value. Add a cover, description, and materials as needed. Review and save. Open the lesson to check picture, sound, and duration before publishing it. Also check that the course is published.
Tip
Already host the video elsewhere? External player lets you provide a supported address. It uses the chosen service; it is not the same as uploading the file to native streaming.
Frequently asked questions
Can I publish as soon as upload finishes?
Wait until playback is available and check it. Then publish the lesson.
What should I record if there is an error?
Keep the exact message, time, filename, file size, and the stage where it stopped. These help support distinguish upload failures from processing failures.