
How to create a group and set its access
A group brings people together around a topic or class. It can work as a post feed or as a messaging chat.
For example, a class can use a post group to share activities. For quick conversations, choose Chat. Also decide who can join.
Start on the platform, outside the admin panel. If you are in the panel, click Back to the platform. Follow this path: Aura › Create › Group.
1Choose the group type
Open the Aura bubble and click Create › Group. Under Tipo (type), choose Posts or Chat, then click Continue. Creation allows one of these types per group.
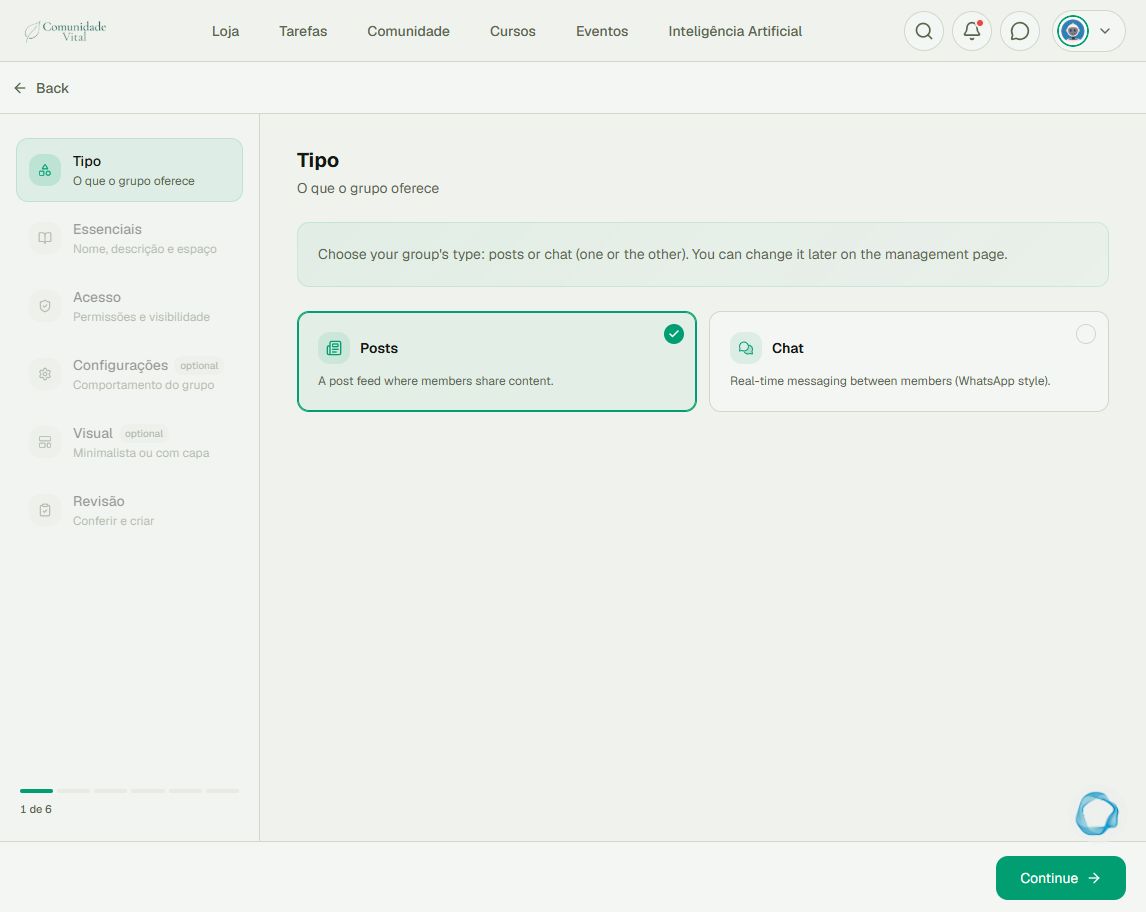
2Enter details and choose the audience
Under Essenciais (essentials), enter a name, description, and space. Under Acesso (access), choose the appropriate rule. For a badge-based group, choose Restricted and select the allowed badges. Review the option to include members who already hold the badges: it controls their initial inclusion.
3Configure participation and appearance
Under Configurações (settings), review who can post, member visibility, and, for posts, whether group posts appear in the main feed. Under Visual, set the group’s presentation. These step names also help you find the controls when editing later.
4Review, create, and check
Under Revisão (review), check the type, audience, and settings before finishing creation. Open the group and check it with an account in the chosen audience. To adjust it later, open the group and click Manage.
Tip
To organize access by class, read the badge creation and assignment articles. To oversee posted content, read Moderation.
Frequently asked questions
Does adding current members include future registrations?
No. Initial inclusion and automatically including new members are separate options. Check the latter if that is the behavior you want.
Can posts stay only inside the group?
Yes. In group settings, turn off showing group posts in the feed. This does not delete the group’s posts.